Our recommendations are made independently through Research & Testing. We may receive commissions from purchases made via our links.
How to Dry Dill
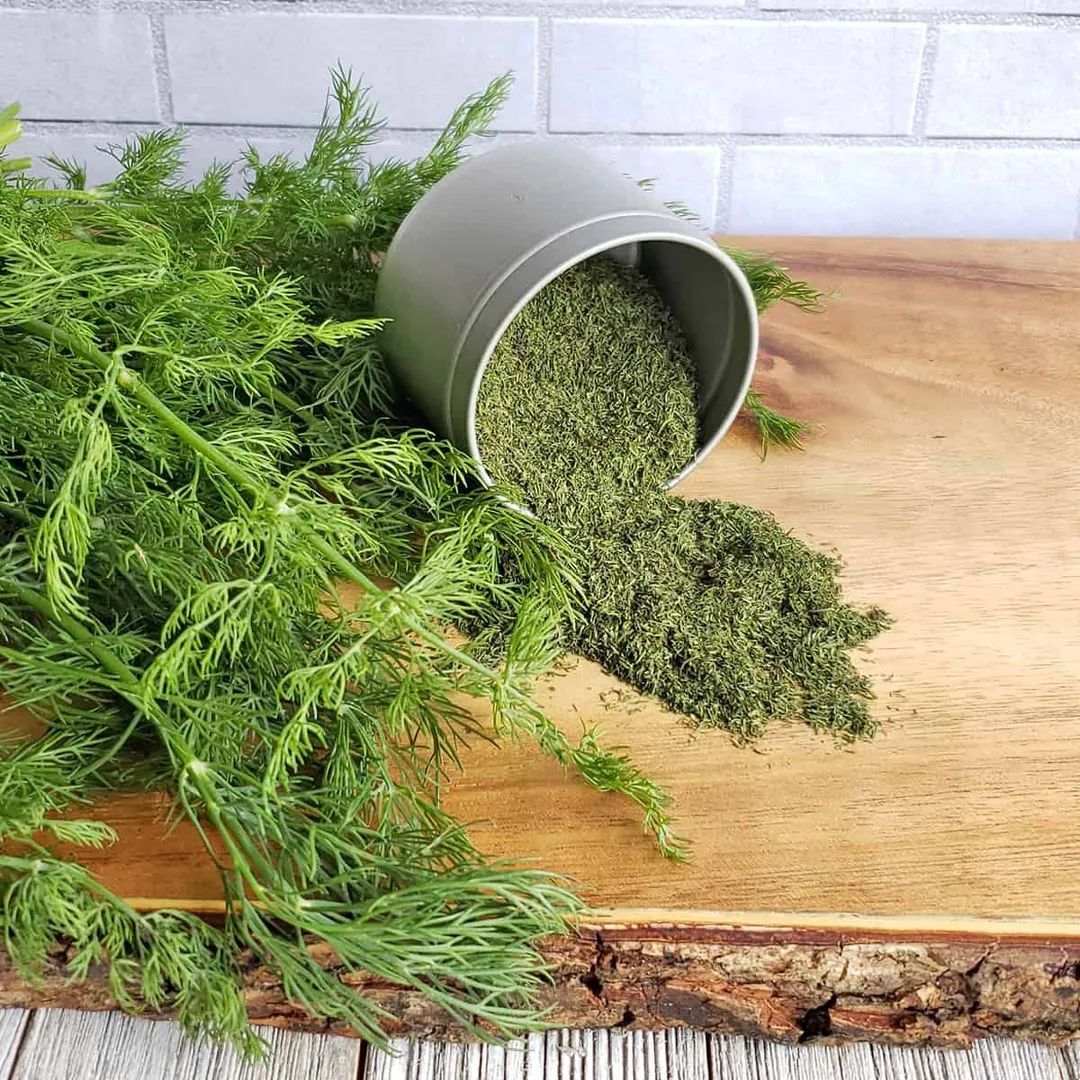
Fantastic with seafood and great for pickling, dill weed is a super culinary herb. If you love it, learn how to dry dill here to keep it around for years!
Despite being a fantastic herb, dill weed is tragically underused.
Aside from being super useful for canning pickles, dill can also be added into a variety of dishes to improve flavor. Its citrusy, slightly grassy taste makes it a great companion for seafood in particular.
Unfortunately, fresh dill weed doesn’t last very long which is why learning how to dry dill is important. Our guide is here to show you how!
Fresh Dill vs. Dried Dill: Which One Is Better?
1. Storage Time
When it’s stored properly in the refrigerator, a bundle of fresh dill will last around 10 to 14 days. This is a pretty good storage time compared to other herbs like basil, which only go for up to a week.
Dried dill, however, can comfortably exceed this. Kept in a pantry, dried dill will remain usable for up to 6 months.
So, if you’re gunning for longer storage time, definitely choose dried dill over fresh.
2. Flavor and Aroma
Unfortunately, this is where dried dill falls short.
During the drying process, a good portion of the essential oil that makes up the natural flavor and aroma of dill weed can vaporize. Over 50% of the dill’s essential oil can be lost in this manner.
So, compared to fresh dill, the dried counterpart doesn’t taste as “fresh” or “bright”. You will still be able to recognize the unique citrusy tone of dill weed. However, do expect the grassy undertone found in fresh dill leaves to not be as strong in dried dill.
Nonetheless, even though it loses a lot of that precious essential oil, dill will generally be stronger than fresh. When moisture is removed, the essential oil becomes more concentrated and pronounced. This doesn’t necessarily make it taste better, mind you.
3. How to Substitute Dried Dill for Fresh
Despite its overall weaker flavor, its higher strength means you have to use a reduced portion of dried dill.
Just remember the mantra: “Three teaspoons fresh, one teaspoon dried” and you’ll get the hang of it.

Still, this amount is the general guideline and you should be flexible and taste test when you actually put it to use. Over the course of a few months, dried dill’s flavor and aroma could weaken further. When this happens, you may have to add more to the recipe to achieve the desired taste and scent.
How to Dry Dill: The Best Methods
There are four main ways to dry dill.
The first is natural drying. This method is the simplest and doesn’t require any special appliance. All it entails is hanging the dill weed somewhere with plenty of airflow and letting it dry on its own over the course of a few weeks.
The second method is oven drying. The heat from the oven is gentle and fairly stable, which makes it ideal for drying herbs such as dill weed. This method is quicker than natural drying. You can produce a batch of dried dill in around an hour or two.
If you don’t have an oven, you can resort to the more ubiquitous microwave, instead. Drying with the microwave is risky since its heat is very harsh and can ‘overcook’ your herb in an instant. But if you have no other choice and you’re careful enough, it’s possible.
Drying in the microwave is very quick, too. You only need a few minutes at most.
Lastly, you can use a food dehydrator. Not everyone has a dehydrator at home, but if you do, it’s arguably the best, safest way to dry dill weed — and just about anything else.
1. Dry Dill Weed Naturally
Step 1: Prepare the Herb for Drying
Gather the sprigs of fresh dill weed into a bundle. Tie the stems together with a cotton string or a rubber band. Make sure not to tie it too tightly so that the inner sprigs will also have the chance to be dried.
Step 2: Hanging
Next, find a place in your home with good airflow. This place is usually on your patio or front porch, an open window, or a threshold from your house to the outside.
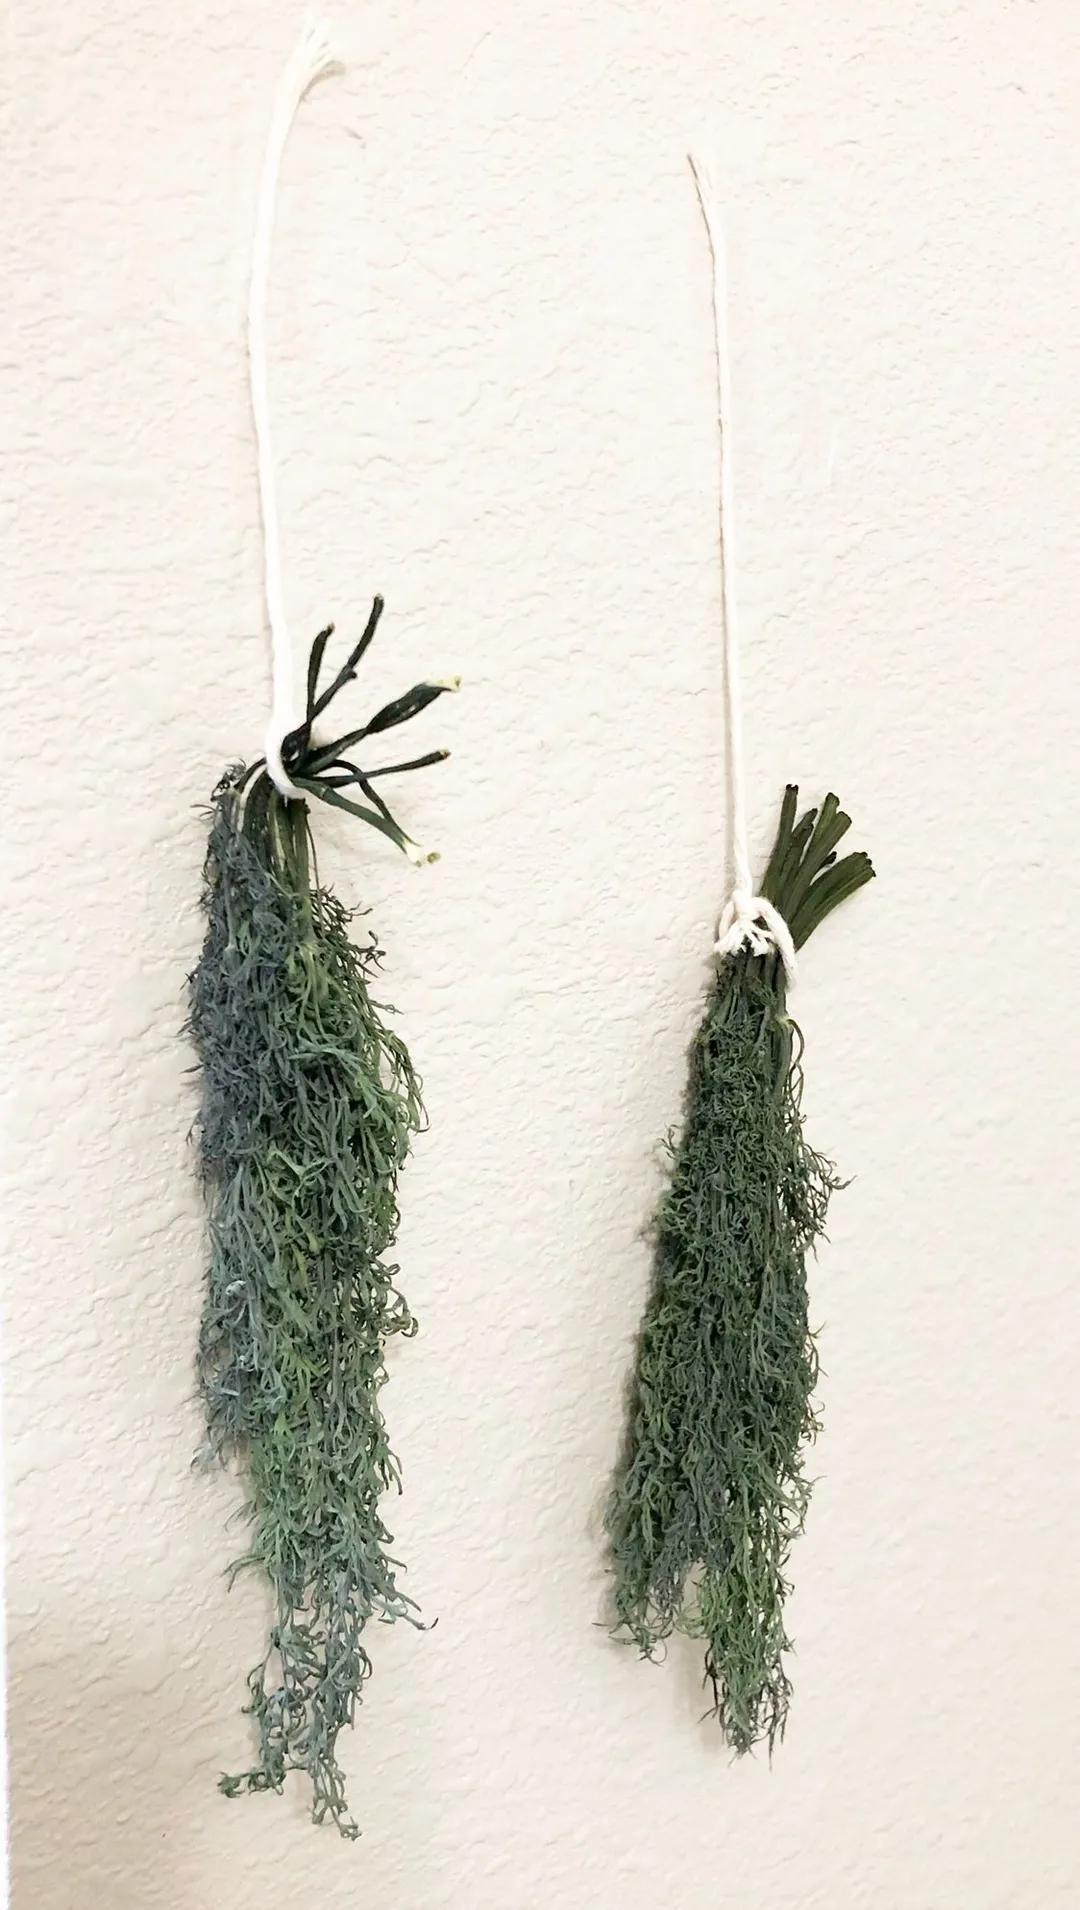
Hang the bouquet of dill weed there, upside down.
It will take around 2 to 3 weeks for the dill weed to fully dry. Throughout that time, check on the herb daily to monitor for signs of mold or rot. Discard any sprig that’s already molded or rotten to prevent them from spreading to other unaffected sprigs.
After the alloted 2-3 weeks, you can check the state of the herb by lightly touching and squeezing the leaves. When it’s fully dried, the leaves will be very crumbly and easily come apart between your fingers.
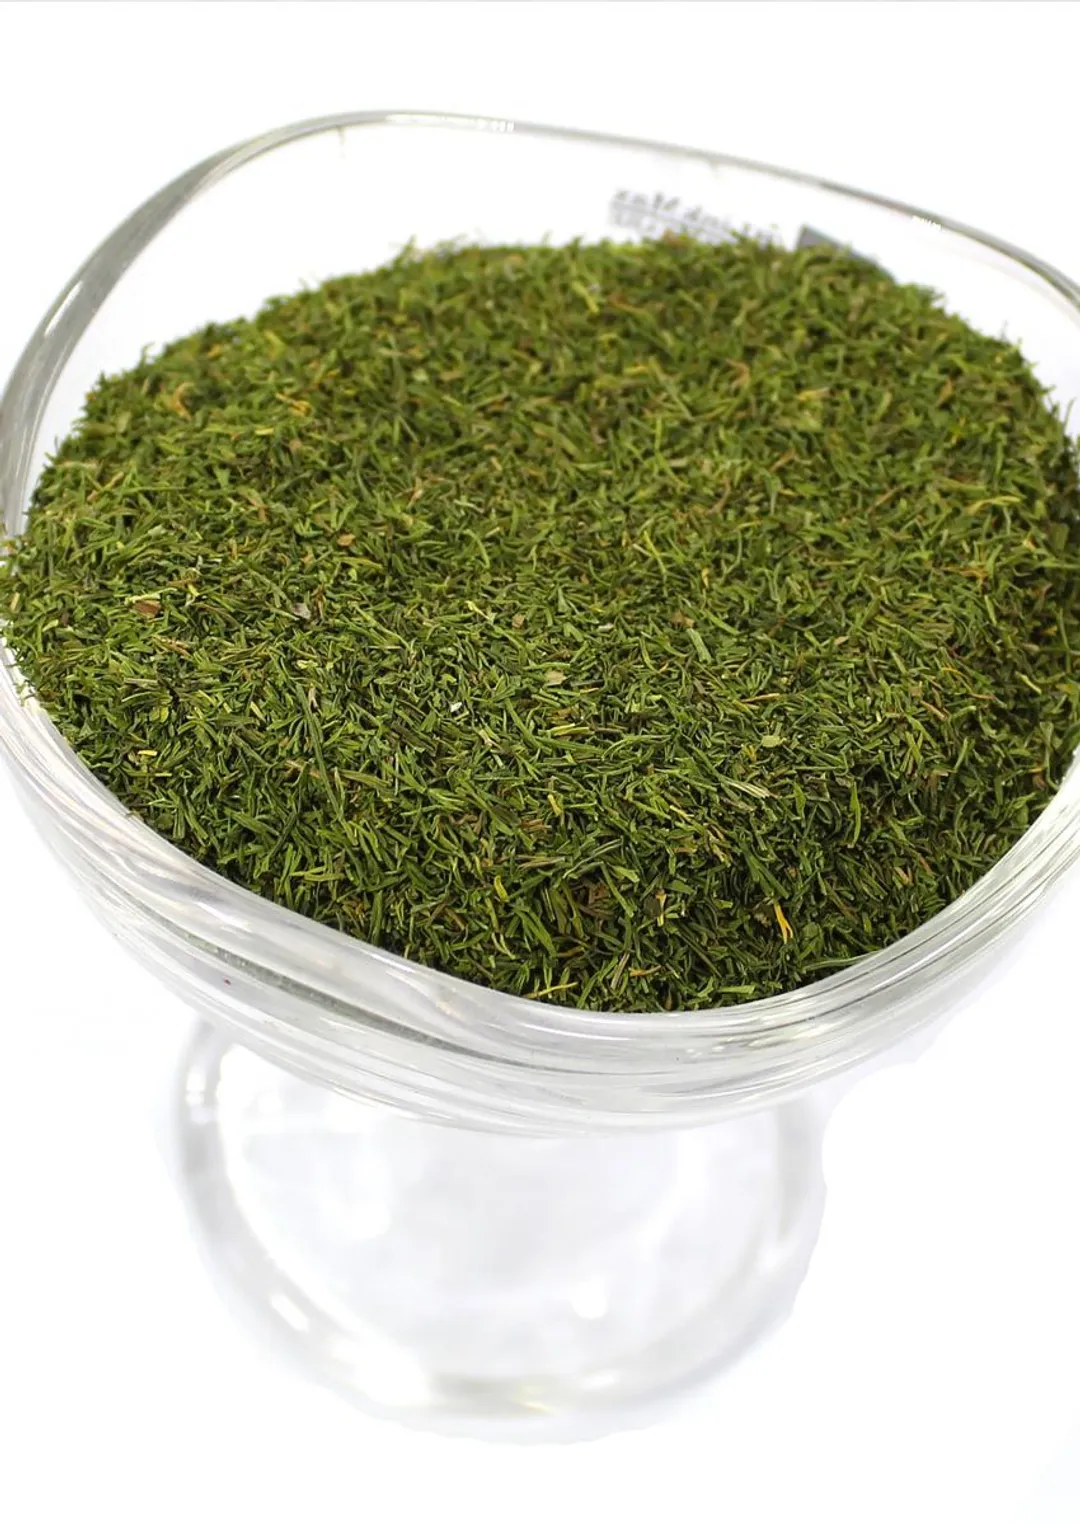
Step 3: Post-Processing
Once it does, take down the bouquet. Remove the leaves from the stems.
Gather the leaves into a mixing bowl. Crumble them up using your hand. It shouldn’t be too difficult if the leaves have fully dried out. Alternatively, you can use a mortar and pestle.
Step 4: Storage
Put the grinded-up dill weed leaves into a glass jar and seal. Store somewhere cool, dry, and away from direct sunlight (a cupboard or pantry will do).
Natural drying is the oldest drying method there is. You can use the same process above to dry just about anything. On our site, we have written several guides that include this method.
This article on how to dry peppers, for example, is a star example of natural drying. Herbs can also be dried in this manner. We have air-dried oregano with great results.
You can also find our guide on how to dry mushrooms the au-naturel way too!
2. In the Oven
Step 1: Prepare the Oven and the Herb
Preheat your oven to the lowest temperature available. Usually, this is between 170°F and 200°F. The range between 170°F and 180°F is the best for drying. Drying at 200°F is perfectly okay, but we recommend exercising caution to avoid overdrying.
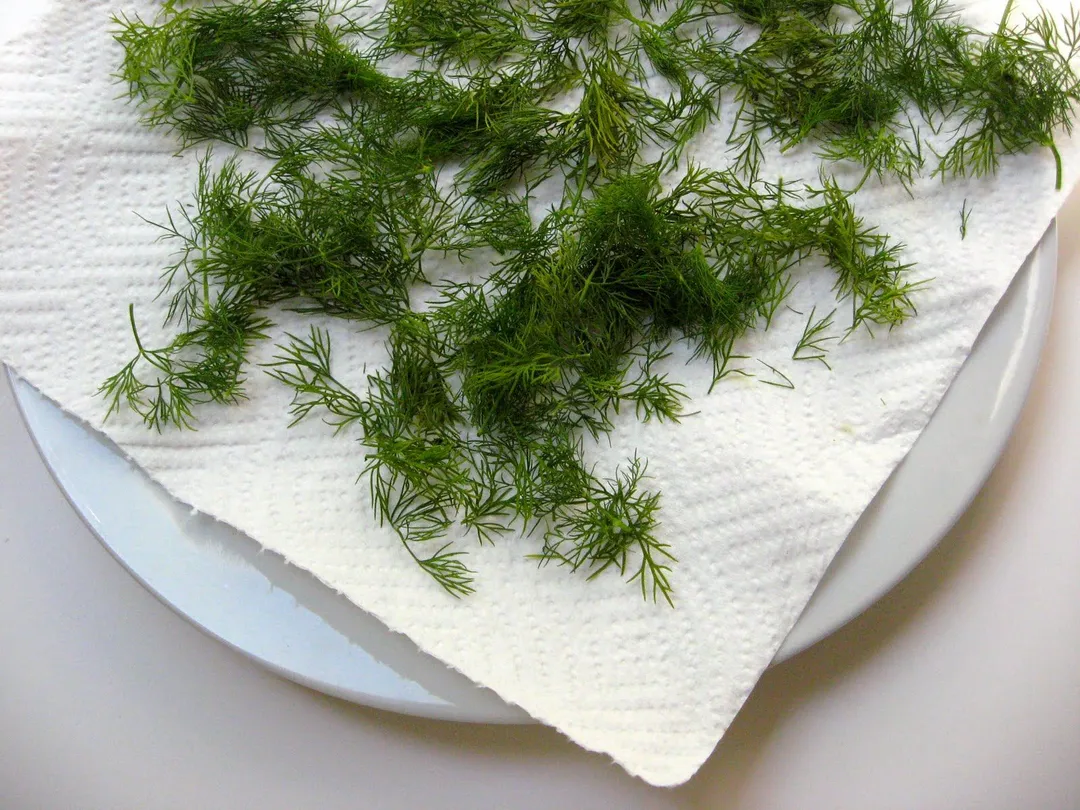
While the oven is doing its thing, go ahead and clean up your dill weed. Wash the sprigs in cold water and dry thoroughly with a towel.
Take off the leaves from the stems and arrange the leaves on a separate towel. Pat the leaves dry with a paper towel. Ensure that there’s little to no moisture on the dill weed once you’re done.
Step 2: Arrange the Dill for Drying
Scatter the dill weed on a parchment paper-lined baking sheet. Make sure that you don’t layer them too thickly on the surface of the sheet; they need space to dry.
Step 3: Drying
Once the oven has finished its preheating cycle, put the baking sheet in. Heat for 25 minutes.
Afterward, check on the leaves to see if they have dried or not (they should be crumbly when squeezed or pinched). If they have, remove them from the oven and proceed to the next step. Otherwise, heat for another 10-15 minutes until they’re completely dried.
Step 4: Post-Processing and Storage
Allow the dill weed to cool down outside of the oven for 15 minutes. Leave them on the sheet.
Take one end of the parchment paper and roll upward. Squeeze the paper as you go to crumble the leaves.
Knead the rolled-up parchment paper for a minute or two for the dill weed to fully fragment.
Pour the crumbled-up leaves into a glass jar. Seal with an airtight lid and store.
The oven is a pretty versatile dryer. You can dry a variety of produce quickly and efficiently with it. And since just about everyone has one in their kitchen nowadays, it’s probably the most accessible as well.
You can check out our guide on how to dry basil. Other sensitive herbs can also be dried pretty well in the oven and the process isn’t all that different, either. It’s possible to dry rosemary, or even dry mint with it.
3. In the Microwave
Step 1: Prepare the Herb for Drying
Wash your dill weed under cold water. Pat dry using a dry towel as well as paper towels. There should be next to no moisture remaining on the dill weed.
Take out a microwave-safe plate, line it with two pieces of paper towel.
Arrange your dill leaves on top. Make sure there’s plenty of space between the sprigs. It’s also crucial that you do not layer the sprigs. If you do, they won’t dry right (especially the bottom layer).
We understand that this could be an issue if you have a lot of dill weed to dry. In that case, separate the sprigs into batches. Don’t try to cram them all together on a single plate.
Cover up the dill with another layer of paper towel before putting the plate into the microwave.
Step 2: Drying
Tune the microwave to High power (700-1,200 watts) and zap the plate for 3 minutes. Check the dill to see if they have turned crumbly after that. If they haven’t, proceed to dry them in 1-minute bursts until they do.
Take the dried herb out of the microwave and rest for 10-15 minutes.
Step 3: Post-Processing and Storage
Crumble up in a mixing bowl or a mortar and pestle. Store the crumbled dill in an airtight glass jar. Preserve somewhere cool, dry, and away from direct sunlight.
The microwave is the least recommended method because of its harsh heat. If you don’t time the heating right, you’re at risk of incinerating whatever you’re attempting to dry inside.
Still, it’s a good alternative if you don’t have the option of any other method.
Our other drying guides also mention the microwave. We have talked in detail about how to dry cranberries in the microwave. Additionally, it’s also featured heavily in our guides on how to dry thyme and how to dry cilantro.
4. In the Food Dehydrator
If you have a food dehydrator at home, it is the best method to dry your dill.
Its biggest advantage is that it’s made specifically for drying. This puts you at a much lower risk of overdrying the herb than you would be with an oven or a microwave. You also don’t have to worry about molding, rotting, or having to spend weeks waiting for the dill to dry naturally.
Step 1: Prepare the Herb for Drying
To dry dill with the dehydrator, first, rinse the herb carefully with cold water.
After rinsing, dry them off using a dry towel. Pat down the herb gently for a second time with paper towels to absorb any lingering moisture.
Step 2: Drying
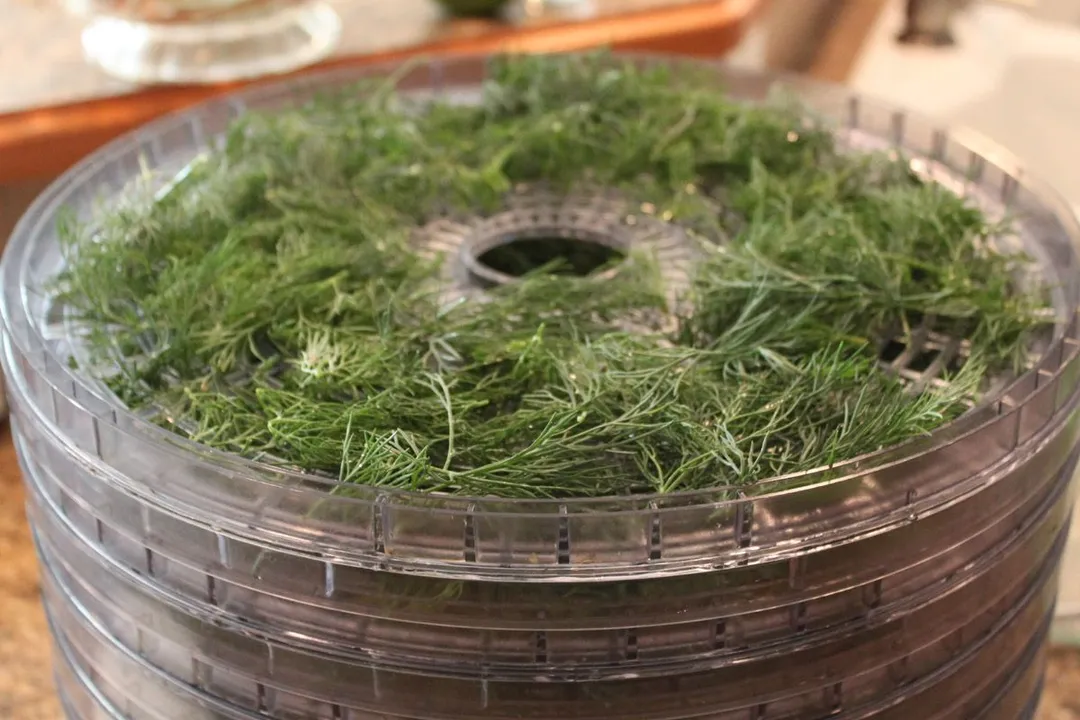
Put the dill on the dehydrator trays, and then pop the trays into the dehydrator. Set up the machine for 95°F. Heat for 4 to 6 hours.
Check on the dill thereafter by gently pinching one of the dried-out sprigs. If they crumble easily, they’re ready.
Step 3: Post-Processing and Storage
Take out the dill sprigs and crumble them up. Use a mixing bowl and your hand if you don’t have a mortar and pestle.
Store in an airtight glass jar. You can put it away in your pantry or any other suitable spot in your home.
Like we said earlier, the food dehydrator can be used to dry anything. It’s the ultimate dryer, hands down. Aside from all of the vegetables and herbs, you can use it to dry fruits too.
Fancy learning how to dry orange slices? We got you covered here at this link.
Conclusion
Granted, dill weed isn’t the most popular herb. However, if you’re part of its fan club, learning how to dry dill correctly is definitely a useful skill to have. You will be able to use it all year round.
Try out the four methods in your kitchen and tell us how it goes!
Authors

Luna Regina is an accomplished writer and author who dedicates her career to empowering home cooks and making cooking effortless for everyone. She is the founder of HealthyKitchen101.com and HealthyRecipes101.com, where she works with her team to develop easy, nutritious recipes and help aspiring cooks choose the right kitchen appliances.